Excite and Explore

One mom, one toddler and a passion for learning and adventure.


2 Comments

Edible Summer Luau Sensory Bin

   The weather is beautiful and we felt like celebrating the start of summer with some sensory play. I recently saw this awesome post on Blog Me Mom with this amazing Edible Sand Recipe and knew we had to try it! I just want to take a minute to rave about this recipe, it is incredibly simple, smells amazing, and feel just like sand while at the same time being edible so it is perfect for little ones who like to put whatever they touch in their mouths. We whipped up a small batch in green and pink, which Gray loved helping to make.


DSCN0505
DSCN0507
   Then we put it away until after nap time, because he was getting a little worn out. While he was asleep I added some luau flowers, sea shells and a little plastic beach shovel and it was ready for play! I set it up on top of a plastic picnic table cover for easy clean up and when he woke up I put out the little bin.

DSCN0508
He plucked up the shovel. My son has always been a bit reluctant with sensory play until he has had some time to poke and prod at the base material with a scoop or shovel, but once he is used to the idea he usually dives in. He had a great time scooping sand with the shovel and shells and just mixing it around in his hands, and I think in the future we will have to make a bugger version of this recipe for more play.

DSCN0544
DSCN0548


8 Comments

10 Boredom Busters Using Things You Already Have At Home

boredombusters

I’m going to be honest, we have been in a bit of a rut at our house. I seem to find myself stuck with a bored toddler and not a clue what to do next, which is a bit unusual for me, there always seems to be something new to try. Keeping your child occupied isn’t always easy, and you don’t always have time to run out to the store and pick up materials to put together an activity, so with some help from my fellow bloggers I have compiled a short list of fun activities that you can do with your child, using things you (probably) already have lying around or stored in the back of the cupboard, that will keep your little one entertained!

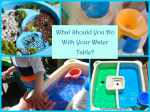
1. Soap Bubbles on Water – Simple Fun For Kids

Kids love water, it is a fact, and nothing pleases them more than splashing around, especially on a hot day, so why not add some bubbles to the mix? Trust me, the simple things are often the most beloved! Find out how at the link!

Image

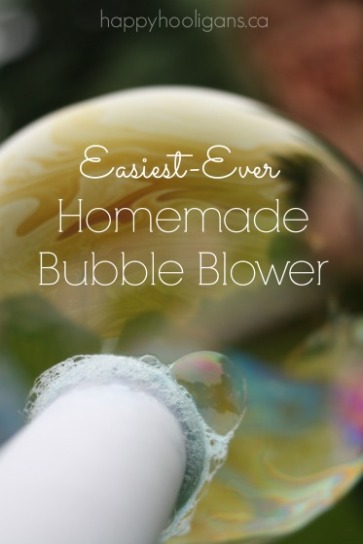
2. Homemade Bubble Blowers – Happy Hooligans

If you didn’t notice my enthusiasm for bubbles in the first post let me re state this, kids LOVE bubbles, and they are easy entertainment, so why not try making your own Homemade Bubble Blower! This looks like so much fun, and is super simple, we will be trying this later this afternoon, as we are big bubble fans in our house and these look really easy for a small child.

Image
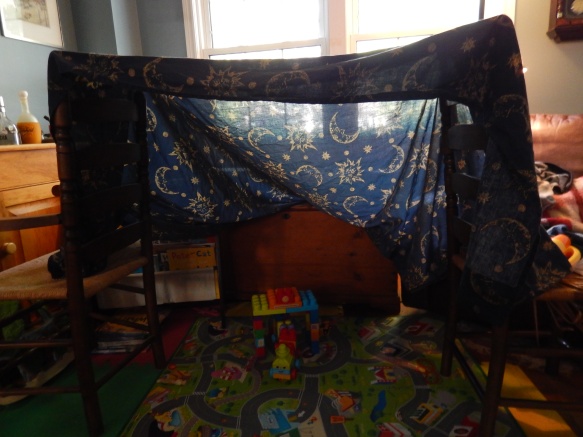
3. Make a Fort – Excite and Explore (Us)

Yesterday we were in the midst of wandering around our living room aimlessly, still stuck in the aforesaid rut, when I thought back to what I liked to do as a child, and topping that list was making a fort. Forts don’t need to be complicated, or fancy and you don’t need any special fort making kits or materials, it can be as simple as two chairs and a blanket. We happen to have the perfect fort making chairs, they have very tall backs that are just begging to have a blanket draped over them, sometimes secured with an elastic over the tip of the knobs. I am a bit ashamed to admit that since having my son, who recently turned two we have not actually made one until the inspiration hit yesterday, and soon he was running in and out of his “fot” (yes, it sounded like fart) waving his arms in the air and giggling.

Image
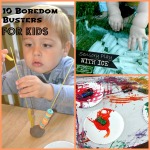
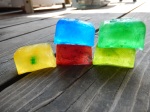
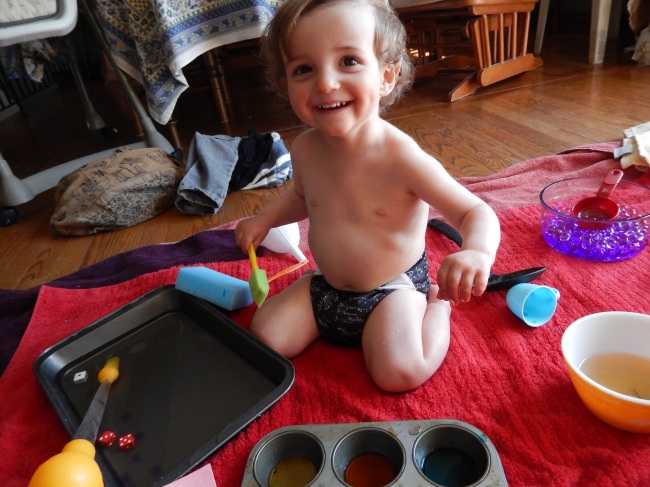
4.  Sensory Play With Ice – The Realistic Mama

But what about babies I’m sure you’re asking, well fear not, we have some simple fun for them as well! We love this idea from The Realistic Mama about using ice as a sensory experience, check it out!

Image

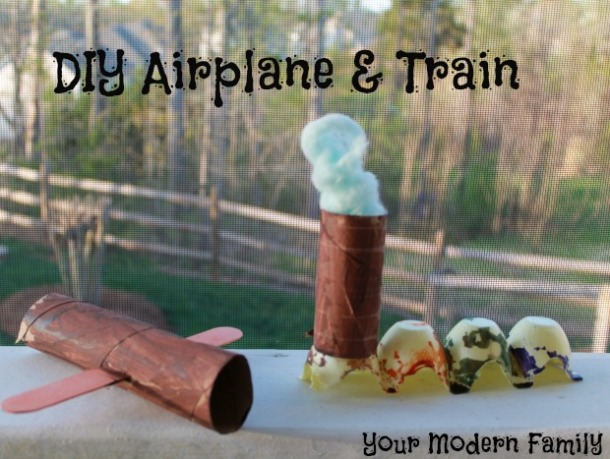
5. DIY Airplane and Train – Your Modern Family

What kid doesn’t love plains and trains, because mine sure does! This craft looks so cute, and it uses toilet paper rolls and egg cartons, which I stockpile in the house like a kid stockpiles broken crayons, because there is always some cool use for them! Follow the link to find out how to make your own cool craft!

Image

6. Water Play At Home – Excite and Explore

Water, water, water. You may feel like I am being a bit repetitive but water is easy to access and easy to clean up after, so check out this fun set up using things you can find around your house (except maybe the water beads) that will pass the time away a fill it with big smiles. Plus, it is summer and some days you need some water play in order to cool them down.

Image

7. Painting With Cars – Teaching 2 and 3 Year Olds

Cars are like currency to children, they treasure them as we treasure that no fat, extra foam latte. Okay, maybe not but it is something found in pretty well every house hold. This fun activity uses them as an art medium, bringing new fun to the table (and possibly all over your walls) and we will be doing this tomorrow when he gets a bit restless.

Image

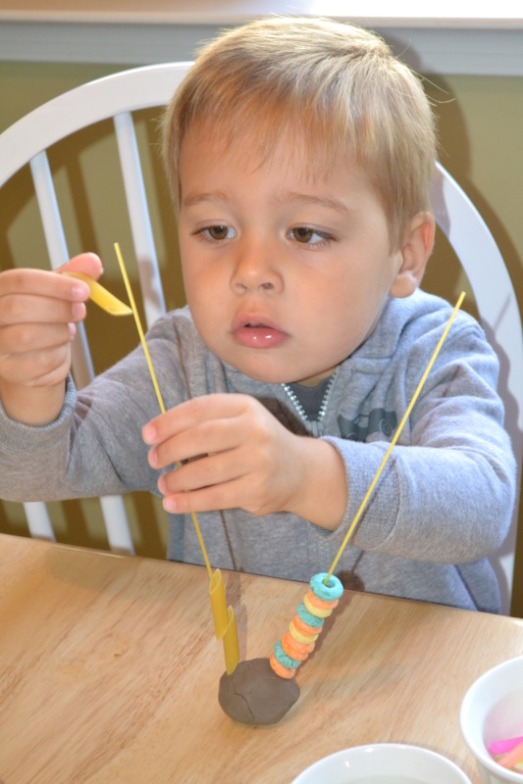
8. Pattern Towers With Spaghetti – Mamas Like Me

Pasta is a staple in a lot of households, but it is for more than cooking! Check out the fun they had over at Mamas Like Me with their spaghetti!

Image

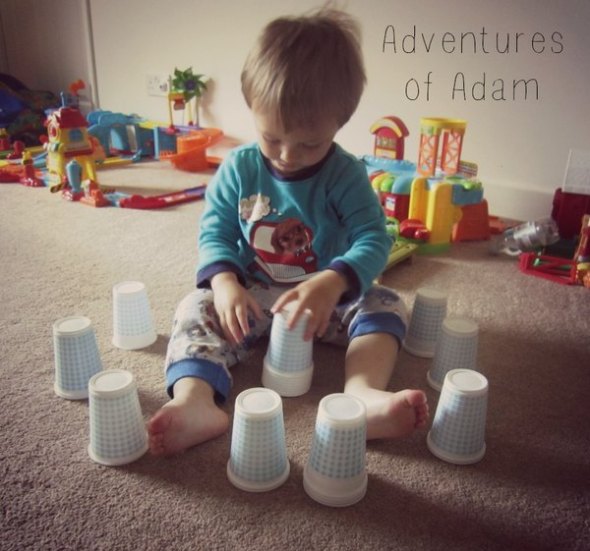
9. Stacking Cups – Adventures Of Adam

Sometimes simple really is better, and kids will find a way to play with just about anything. (Trust me on this) Check out the fun this little cutie had with some simple plastic cups and his imagination

Image

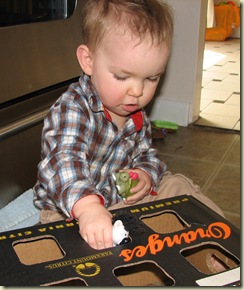
10. Non-Shape Sorter – Mama Smiles

Need to keep the baby brother or sister occupied while your toddler tries out that Homemade Bubble Blower? This activity is perfect for the young baby who hasn’t quite grasped the concept of the shape sorter, and it is something you can easily put together, check it out!

Image

Well I don’t know about you but I’m feeling pretty inspired right now, and I’ve already pulled out some stacking cups for when the toddler wakes up from his nap. I hope this might help you find some fun activities for you and your kids, thank you for joining us at Excite and Explore!


2 Comments

Learning Letter | E is for Elephant Small World

 Learning letter is a huge part of a toddlers development and this week we learned about the letter E with some fun activities for my little toddler. We started off with our Letter E tin, which he has grown accustomed to and is usually pretty eager to examine. The letter E bin featured our Letter E book, and egg, the number eight, an excavator, big and little E’s and an elk.

Letter E Bin


   We examined each object and talked about them a bit while emphasizing that they start with the letter E. Then we moved onto our activity, an Elephant small world! This was ridiculously simple and easy to throw together in a couple minutes (which is exactly what happened) and was a big hit. I used a really small bin since my guy is pretty small and doesn’t need a huge one, feel free to use any size you wish! I headed outside and lined it with some fresh grass and sand to which smelled wonderful! Then I used some blue rice I had left over from a previous bin for the watering hole and threw in some rocks. You can make your own dyed rice by checking out Learn Play Imagines post about how to make vibrant, colourful rice of your own! Like I said, this bin is really a small, simple project but it is big with the little ones! I added some plastic trees and elephants, and it was all ready for my wee man.

DSCN0445DSCN0446

   He spent some time making the elephants drink from the watering hole, then in typical toddler fashion started running his hands through the sensory materials and giggling. It no longer resembles a little elephant world, but hey, that just means he had fun!


5 Comments

D is For Dinosaur Lagoon

   Welcome to another letter of the week! This week we will be learning about the letter D, and I will be sharing a fun toddler activity for the letter D, the Dinosaur Lagoon! Since the weather is so lovely we are always looking for ways to cool down outdoors, and thus the dinosaur lagoon was born! It is fairly simple to make, and has provided us with hours of fun for my little one. I filled up our water table with a shallow layer of water (If you use to much water the dinosaurs will float)  in one half, and added a few drops of food colouring spread out around the water and mixed it in. Then I took some leaves and rocks from around the yard and placed them around our lagoon, wedging the sticks and some branches from bushes into the rocks so they seemed to sprout upwards. Last came the dinosaurs which were set up around the marsh and it was ready for play, see easy peasy!

Image

Image

   I stripped the little man to his diaper, since the water is coloured with food colouring it may satin clothes, and when he plays in the water table very little water is left in the table by the end. I hope you enjoyed our dinosaur lagoon, thank you for joining us at Excite and Explore!

Image


12 Comments

Saturday Night At The Dinosaur Stomp + Activity

   Image


So we love to read, and spend quite a bit of time doing so every day. In fact my toddler loves to read so much that I get a little…bored of reading the same books over and over again. So last week I picked up a book I found at a garage sale and brought it home, and my little one was engrossed, he loved it! It is a fun toddler book about some very energetic dinosaurs that are having a dance, with lots of fun rhymes and expressive, colourful pictures.  We read Saturday Night At The Dinosaur Stomp many times over the course of the day and later on we did a fun activity to go with it that I think all of you would really enjoy, we made our own dinosaur feet to stomp around with! This is a simple toddler activity that they can help with that will result in a stomping good time! You will need:

cardboard (preferably thicker)

paint

ribbon

Velcro strips

scissors

We started by drawing our version of some dinosaur feet on some old cardboard I found laying around. I cut it out with scissors and it was time to paint. I made them fairly small so that my little guy could easily stomp around in them without tripping all over the place.

Image

   We painted on some red paint and let it dry before adding another coat to brighten up the colour.

Image

   Next I brought out some ribbon and cut a two small holes in the sides of the heel area, threading it through the bottom so both ends came out on top.

Image

   Then I added some Velcro strips to the ribbon to secure it to the foot, putting the scratchy strip facing upwards so it wouldn’t irritate his foot. Then they were ready for play! I secured them to the little mans feet and put on some music. He took a few test steps and soon was stomping all over the living room while giggling away.

Image


1 Comment

Learning Letters | The Letter C

   Today we worked on learning the alphabet, and today we learned about the letter C. We started off with our usual pie tin bin full of things that start with the letter C. We had a cow, a cricket, corn on the cob, cucumbers, a caterpillar, a car, a carrot and a cookie to explore, as well as our Letter C book.


20140601-200009-72009969.jpg
I really love these little bins, they really go over well with the little man. He always dutifully explores the different objects as I chat away about the letter we are learning about, and playing with the toys. As you all know I do the majority of my prep while he naps, and today was no different. We did a caterpillar craft, using some simple materials and a bit of imagination. You will need some construction paper, tape, a pencil, contact paper, scissors, a small plate and a pipe cleaner, all in the colours of your choice. This is a great craft for young toddlers because all they have to do is stick on the pieces, it is a bit off a collage, and my little one isn’t interested in much more than this at his age. Take your plate and use it as a stencil, tracing a circle onto each piece of construction paper, this will be making up the caterpillars body, use as many as you like, we used four.
20140601-191509-69309415.jpg
I then used the inside rim of the plate to trace a smaller circle on the inside and cut it out so it looked like a zero. Then use your plate to cut out as many circles of contact paper as you have body pieces.
20140601-191510-69310397.jpg
You still with me? Peel off the protective side of the contact paper circle and stick it onto the circle made out of construction paper, sticky side facing up. If you are confused here is your caterpillars body.
20140601-191511-69311506.jpg
Do this for all of your caterpillar so you have as many sticky surfaces as you have pieces of body. Stick them all together with tape or glue and add some legs with your scraps. Thread the pipe cleaner through the top of the head, I curled the antennae by wrapping them around a pencil and your caterpillar is ready to be decorated! What you use to do this is completely up to you! I put some ripped up tissue paper, tiny pom poms and snipped up pieces of colourful yarn in a bowl and simply placed it on the floor beside the caterpillar. Once the little man came down he wandered over after some cuddles and I showed him that he could stick the colourful scraps to the caterpillar and he dove right in, taking whole fistfuls and mashing them into the sticky contact paper. I’m afraid my camera took a tumble at this point in the process (yikes! Any one know how to fix a lens error? ) and is out of commission but later in the day I pulled out an old one and took a picture of his finished product.
FSCN0340
Next week we will be moving on to the letter D, we would love to hear your ideas and thank you for joining us at Excite and Explore!


12 Comments

DIY Farm Play Mat and Mini World

   This is a fun project that you can make for your kids out of some pretty basic materials, that will give them hours of entertainment and spur their imaginations.  I started with a big cardboard box, it has been sitting in my garage for about a month and I finally decided that it was time for it to be used. I cut it in half and trimmed off the edges. In hindsight green felt would probably have worked better for the grass than my choice, green wrapping paper but this has been an extra thrifty month for us and this was what I had on hand, however if you are looking for a more durable option go with the felt. I was initially going to use construction paper for the dirt, (I vetoed using real dirt since this is an indoor play area) but I didn’t have enough, but what I did have quite a bit of was burlap, and I figured as an added bonus it would add a bit of sensory exploration to the mat. I made a pond out of blue construction paper and my base was put together.

Image

   Then I started adding little details. In the fields I glued down little puffs of tissue paper as crops (though not to many, feel free to add more than I did, I had a limited amount of time) and added some rocks, a farm dog, some tractors and a tree.

Image

    The pond gained some trees, small rocks, a few sticks as logs, and some farm animals getting a drink.


Image

   I placed in a toy barn with some more animals, trees and what not. I even picked a few small flowers and placed them around the area.

Image

   And so our farm play mat was born and ready for the little one to do some serious playing.

Image

   The little man was quite excited, though anything involving tractors excites him at this point in time, and he dove right in, like a tiny Godzilla tearing through a farm. I thought it held up pretty well, the paper I used as grass ripped in one corner, which is why if I do it again I will make it out of felt. Here are some action shots of the wee man busy plowing the soil.

Image


Image

   That is what we have been up to today, thank you for joining us at Excite and Explore, we hope you enjoyed this post!


3 Comments

What To Do With A Water Table?

   As always we are always looking for fun new toddler activities to do, and this week I pulled out the water table and (after a good scrubbing with a magic eraser) it was ready for some time to shine! I went searching for some inspiration for some unexpected ways to play with our splash works and thanks to my fellow bloggers I was not disappointed! The weather is getting warmer, so here are some fun ways to cool down while making the most out of your water table!

1. Dinosaur Sensory Bin – Fantastic Fun and Learning

  I thought this was the coolest idea! Make a fun for kids dinosaur mini world right there in your water table!

Image

2. Water Beads – Excite and Explore

Why not fill it up with these slippery little balls, a neat sensory experience for your little ones, my son loves this! I sounds odd but I myself find running my fingers through these to be so relaxing, I even had a dream that we filled a pool up with them and it was glorious! Keep in mind that they can be a choking hazard so keep them away from small children or those you worry will put them in their mouth. Always supervise when using water beads!

Image

3. Colourful Foaming Water – Life With Moore Babies

Who didn’t love bubble baths as a kid? So why not bring the foam (and colourful to boot) to the water table!

Image

4. Sensory Spring Water Table – The Pleasantest Thing

It is spring, the dandelions are plentiful, why not?!

Image

5. Coloured Ice Play – Excite and Explore

It is getting warm out and it will get warmer! Cool down with some coloured ice play!

Image

6. Beachcombing in the Water Table – My Nearest And Dearest


What a great way to bring the fun of the beach home with you!
blue-shell

7. Colour Sort Water Table – Frogs and Snails and Puppy Dog Tails
Want to squeeze in some learning while you are at play? Check this out!
colorsortwatertablefspdt
I hope we have been able to help inspire you today, I know we will be having a lot of fun with our water table this summer, we would love to hear some more ideas or feedback, thanks for joining us at excite and explore!


Leave a comment

Learning Letters: The Letter B

   This weekend we are learning about the letter B in our home! We started of our morning with our letter B Themed Bin (or should I say pie tin!) and explored things that start with the letter B! We explored and read the letter B book, and examined a baseball, a Band-Aid, a bulldozer, a little plastic butterfly, a bunny, a button, a beetle and a play food stick of butter.

 Image

   The little one caught on to the ‘b’ sound pretty quickly, it is an easy one for him to say. When snack time came around he was delighted to see one of his favourite things made out of cheese and blueberries, a bus!

Image

   After nap we went on a bug hunt! There is a huge field near our house full of dandelions, so naturally it is a haven to bumble bees so we popped on down to observe. I was a bit hesitant at first, since Gray has never been stung and I’m not sure If he is allergic, but we have no family history of it, so I decided it was okay, besides he loves dandelions, so once he saw the field there was no keeping him out! We went on down and saw quite a few flying fuzzies, which I was sure to explain we could not touch.

Image

Image

   Then we headed down into the gully to hunt for bugs. It is a beautiful little spot with a  stream, lots of plants and some trees and a little field. We found lots of snails, which Gray carried around for the rest of the trip. Of course we talked about how bugs starts with the letter B, and we managed to scoop up some beetles and a June bug as well.

Image

   After our little nature walk we released our little friends and came back home for one more letter B activity, bulldozer painting! This was inspired by an awesome post I saw on Fun At Home With Kids about using toy cars to paint. Gray loves his bulldozer and it has some pretty cool treads, so I figured, why not? Gray is almost 2, so art activities need to be pretty simple and easy to do or he will have no interest in it, this activity was perfect, it was art and play at the same time!

Image

Image

   I would call our letter B weekend a success, now when he sees the bulldozer he points to it and makes the ‘b’ sound, and for now he seems to be able to identify it by sight. Sorry this post is a bit late going up, we have been putting in a vegetable garden this weekend so we have been pretty busy! We would love to hear some feedback or your ideas for the next letter, thank you for joining us at Excite and Explore!


6 Comments

Coloured Ice Play

   So recently I saw this neat post on Learn Play Imagine about coloured ice play and I thought we would give it a try and share some ways to play with coloured ice. It is really easy to make, and we used the put the food colouring in the ice cube tray before water method, which left us with really nice, evenly coloured ice. I put two drops of food colouring for each ice cube and added water.

Image

   I also made some bigger pucks using more food colouring and some glass cups.

Image

   I left it over night in the freezer, and since the weather was lovely today I pulled it out in the afternoon to have some fun. (I turned on the hot water and ran the sides of the cup under the water to loosen it to get the pucks out.)

Image

   I left the cubes in a bowl by the water table and released the toddler, after stripping him to his diaper and a hat since I wasn’t into scrubbing food colouring out of his clothes. He was really curious as to what exactly these were, so in typical small child fashion he tried to eat them, but once he discovered that they weren’t anything special he started off by using them as building blocks, which was quite the challenge since, being made of ice, they were pretty slippery and slightly rounded from the mould.

Image

Image

   I dubbed this our castle. I had a sudden thought and brought out a Kleenex and we put three different coloured ice cubes on it and left it on the deck to melt.

Image

   Which melted into this really cool tye-dye like piece, that we hung up to dry in the sun.

Image

   Then they went into the water table, swirling around and colouring the water. This was all done in-between attempts to eat the ice cubes, since he seemed convinced that they would taste different than the last time.

Image

Image

   That was our adventure with coloured ice! We would love to hear your ideas for playing with this cooling activity, thank you for joining us at Excite and Explore!